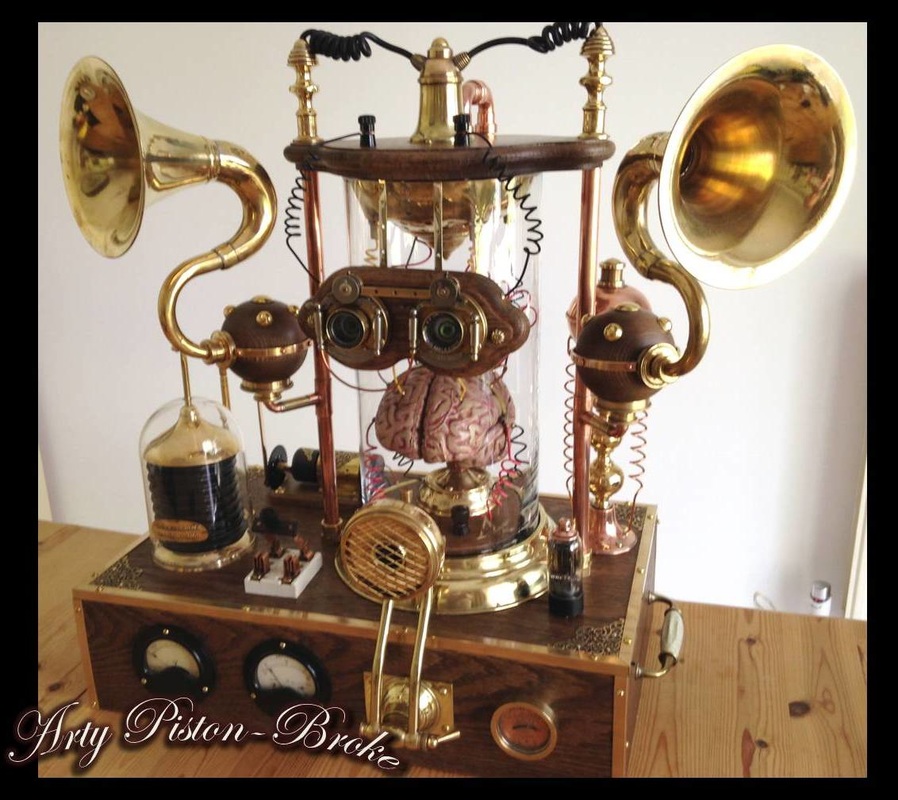
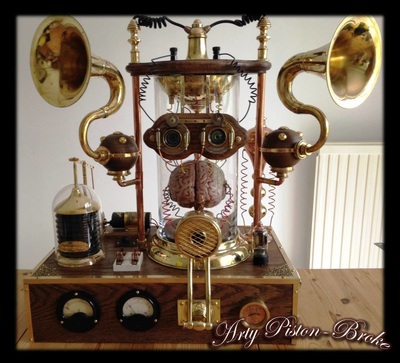
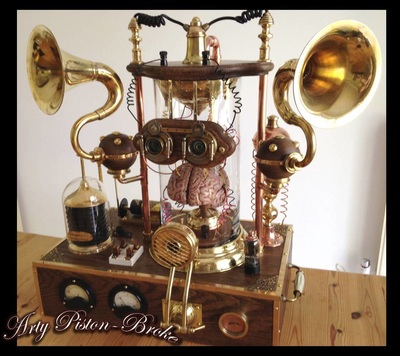
Since I got drawn into the heady realms of Steampunk, I have seen many examples of beautifully made ‘brains in jars’ over recent years and, I had often thought that I would also make one myself one day. Well, I have finally got round to doing just that, It took me a month to complete but things didn’t stop with just the brain in a jar!
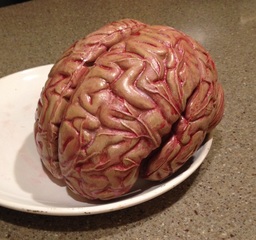
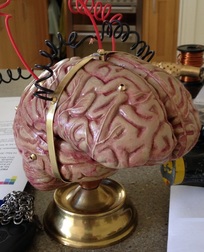
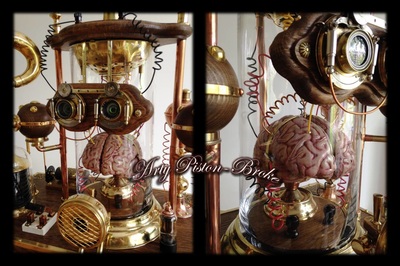
As with all mad scientists’ inventions, it all started off with the search for a brain! I did think about modelling one myself, but managed to source a vinyl anatomy model which was actual size and fitted perfectly into my 170mm diameter glass container. Being hollow, it was also very lightweight. Once assembled, I painted it with acrylics and inks and gave it a silky sheen clear varnished finish. Brass banding and inserts were then applied to act as the connection points for the wires later.
As with all mad scientists’ inventions, it all started off with the search for a brain! I did think about modelling one myself, but managed to source a vinyl anatomy model which was actual size and fitted perfectly into my 170mm diameter glass container. Being hollow, it was also very lightweight. Once assembled, I painted it with acrylics and inks and gave it a silky sheen clear varnished finish. Brass banding and inserts were then applied to act as the connection points for the wires later.
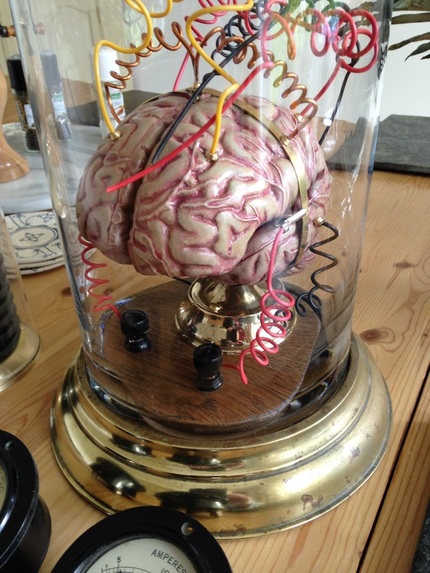
The brain had to be mounted/supported in the container somehow, so I used part of an old candlestick base and a domed-out 22mm pipe end soldered at an angle for the brain stem to fit into. I then had to make an oak base to form a platform for the brain assembly. This took some time as it had to be shaped to fit flat in a container that did not have a flat base, such is the nature of glass! Once given a couple of applications of antique wood stain and waxed, two vintage Bakelite terminals were installed as connection points for wires connecting to the brain.
I had previously sourced an old brass planter which had a 170mm aperture, (hence purchasing a glass container to fit!) from which I removed the topmost section to use as a flange support for the glass container. The oak base raised the brain enough to be level with the top of the brass flange. Inside the top of the container I needed to have some sort of arrangement to connect all of the wires from the brain to. I had an old Tilley ‘Guardsman’ lamp in the workshop which fitted the bill well. It has four terminals where the original frame was mounted which could be used for the wires. I removed the top section to a diameter of 163mm so that it fitted snugly into the top of the container. An old brass horse harness disc was riveted on to cover the hole in the centre and two more inserts were added for the 5th and 6th wires coming off the brain. Numerous holes were then drilled into the dome which would allow light from a mains powered sequencing rope light to illuminate the interior of the container. Four thin tabs were riveted to the edge to allow it to be secured to the wooden lid. The matching oak lid was cut to shape and its edges routed and shaped on both top and bottom faces. Three 15mm holes were drilled to receive the copper support pipes at either side and the pipe to route the lights into the dome. The same staining and waxing was applied to match the base of the brain.
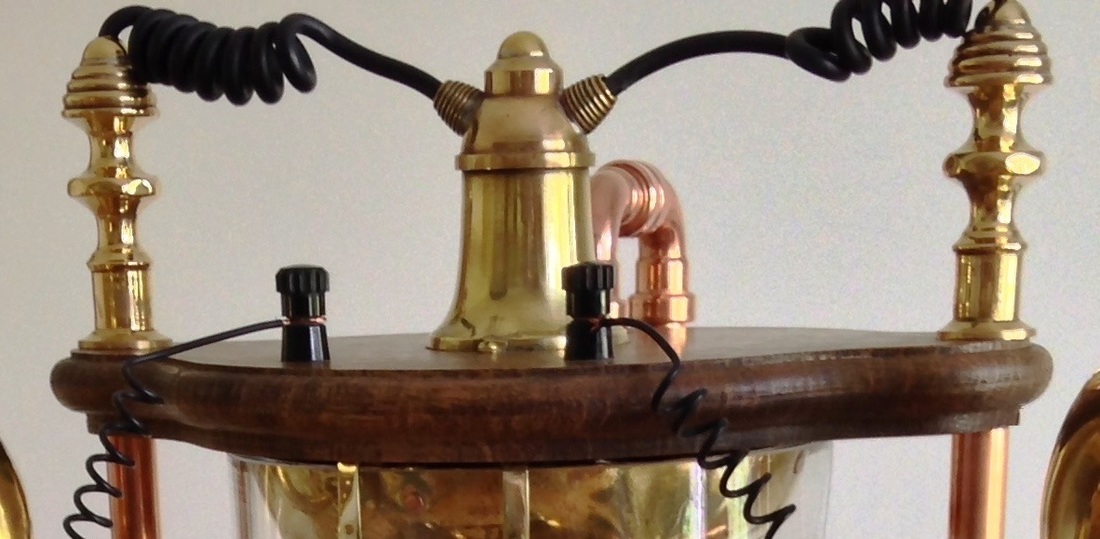
The two copper support columns were cut to lengths to fit into push-fit plumbing fittings screwed into the top of the base unit and for the fitting of brass finials on top. Intersections were added using 15mm to 10mm reducers to act as supports for the audio trumpets. The finials of the supports were made from a pair of candle sticks cut to length and fitted with a brass dome cap hammered from 1.5mm brass sheet. Two more Bakelite terminals were fitted to the front of the lid which will connect the brain to the optical device later. Additional details such as the central connector for wiring to the finials were fitted to the lid including the copper pipe ducting for the lights inside the container.
The two copper support columns were cut to lengths to fit into push-fit plumbing fittings screwed into the top of the base unit and for the fitting of brass finials on top. Intersections were added using 15mm to 10mm reducers to act as supports for the audio trumpets. The finials of the supports were made from a pair of candle sticks cut to length and fitted with a brass dome cap hammered from 1.5mm brass sheet. Two more Bakelite terminals were fitted to the front of the lid which will connect the brain to the optical device later. Additional details such as the central connector for wiring to the finials were fitted to the lid including the copper pipe ducting for the lights inside the container.
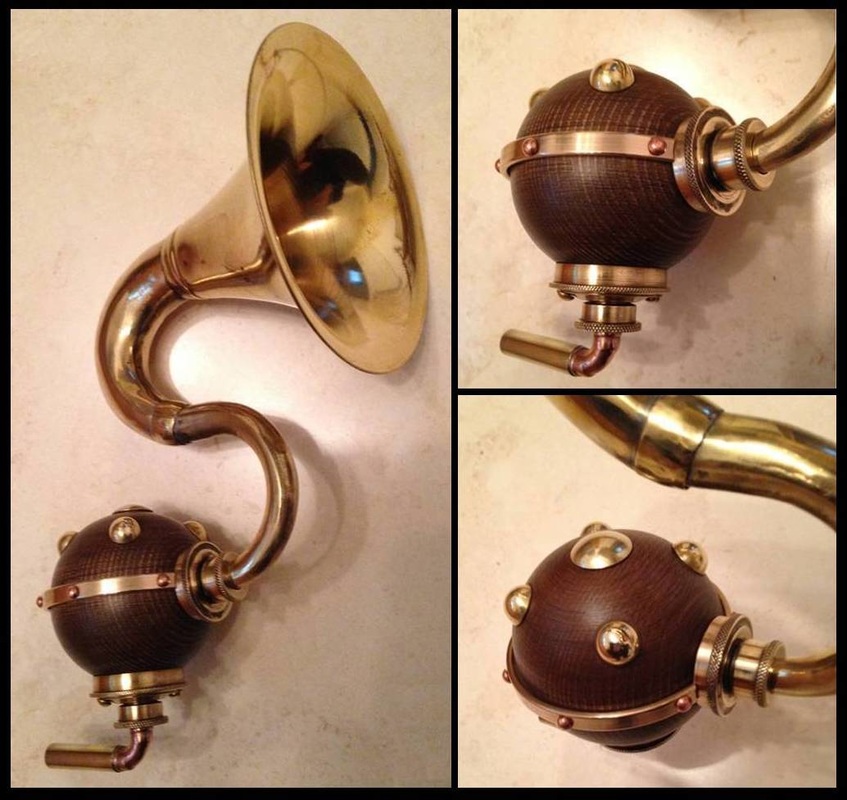
For the brain to operate as a disembodied living entity, I decided that it would need to have sensory input/output. It would need to see, hear and vocalise through artificial means. Hearing, I decided would be via two audio horns which would funnel sound to artificial eardrum membranes transmitting the vibrations as electrical signals to the brain. These were made from two brass car horns with the rubber bulbs removed and a section of the tubing reversed to create an ‘S’ shape. These were then mounted onto 3” wooden balls with brass support brackets. The brass domed studs were made with sheet brass and a doming block, and fitted along with a decorative brass banding secured by copper rivets. The sub-assemblies were then fixed to the copper uprights using the 15mm – 10mm reducing tees.
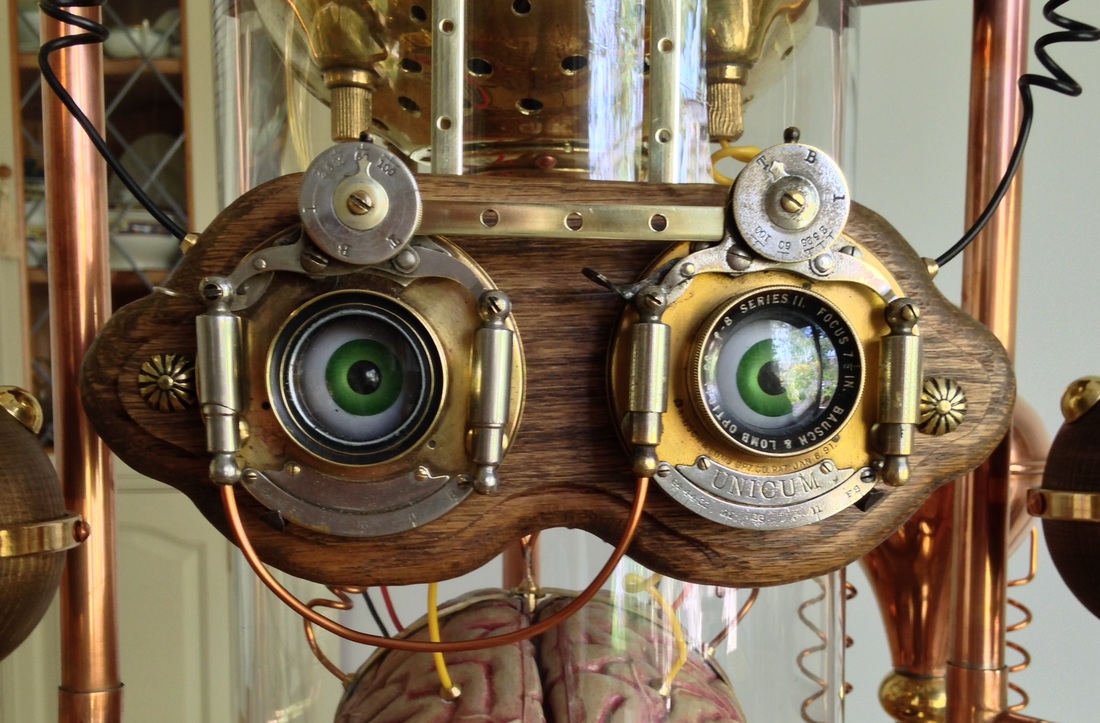
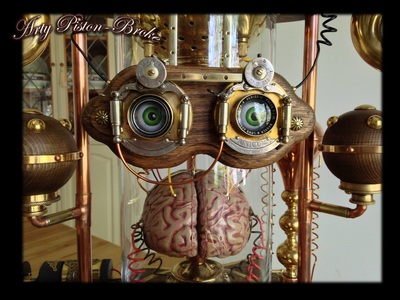
For the optical input, I had originally envisaged a pair of goggles. However, I managed to source a pair of old plate camera symmetrical shutter and lens assemblies which fitted the bill perfectly, and saved me from making a special pair of goggles! The lens assemblies were mounted at the front of the container on a wooden backing plate, secured to the lid with 1/4” brass hangers. I also took the lenses apart and inserted a false eyeball for additional effect.
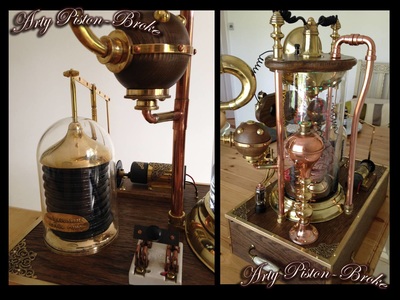
Speech was handled by using the microphone section from an old candlestick telephone and the twin arm from an old bankers desk lamp, combined to resemble an old speaker unit. An additional grille and flange ring were added to the face of the assembly. (A simple speaker circuit was installed, which generates sound operated by a small switch positioned on the side of the base unit). When the circuit is activated, a colour-changing LED also lights up beneath the old radio valve set into the top of the base unit.
The base unit was constructed from 18mm x 120mm pine onto which I applied an oak veneer, then stained and waxed to match the other oak parts. The box is edged in brass with decorative brass filigree corners. Two holes were cut into the front panel to accommodate a pair of old Bakelite meters (amperes and voltage). Ceramic and brass carrying handles were also added as this is going to be quite a heavy piece!
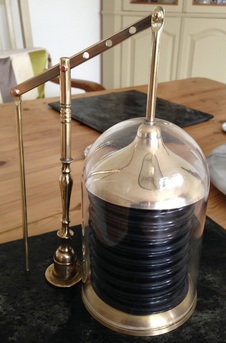
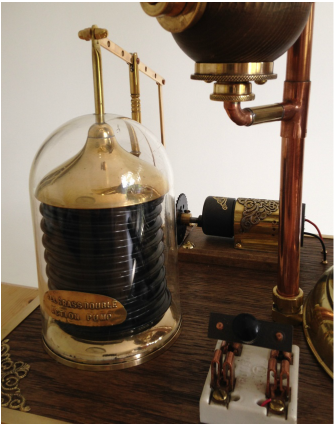
As we all know, brains cannot function without an oxygen supply, so I created an auxiliary oxygen pumping unit. I started with a 9v DC stepped gear motor with a high torque ratio. I painted the red plastic cowl a grey iron colour, made and fitted a decorative brass housing and mounted in onto a small wooden base. The rocker bar is raised and lowered by the pushrod run on a stainless steel bearing riveted to a Meccano chain wheel. The central pillar is made from a candlestick and a length of 8mm diameter stock brass rod to which I added a turned decoration. The compression unit is made using two brass candlestick bases, a 110mm length of internally-sprung air ducting hose and an acrylic display dome. The motor is switched on and off using a vintage ceramic and copper knife switch connected to a 9v battery power supply.
Finally, a copper and brass electrical conductor was made from parts of a candlestick and a small copper jug. I then added a brass finial and two lengths of coiled copper wire.

 RSS Feed
