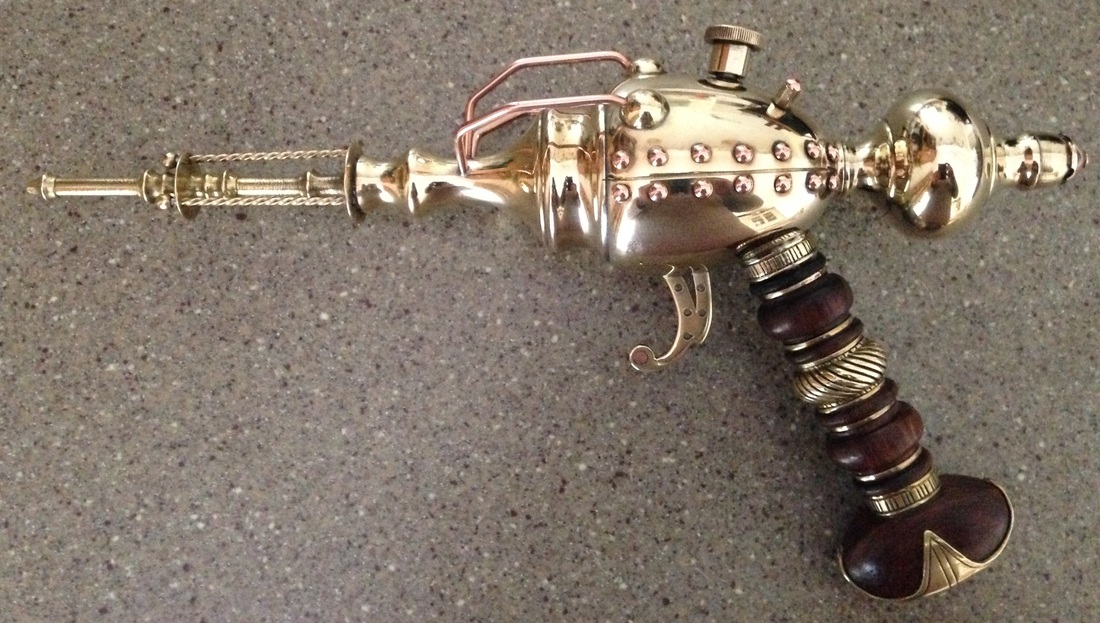
This project started its life as one of a pair of hollow-cast brass lamp stands. The stands were made up of four sections. I took apart the lamp and discarded the base section (for now!) and removed the light bulb holder.
After all the lacquer was removed with wire wool, the next step was to construct each section in order.
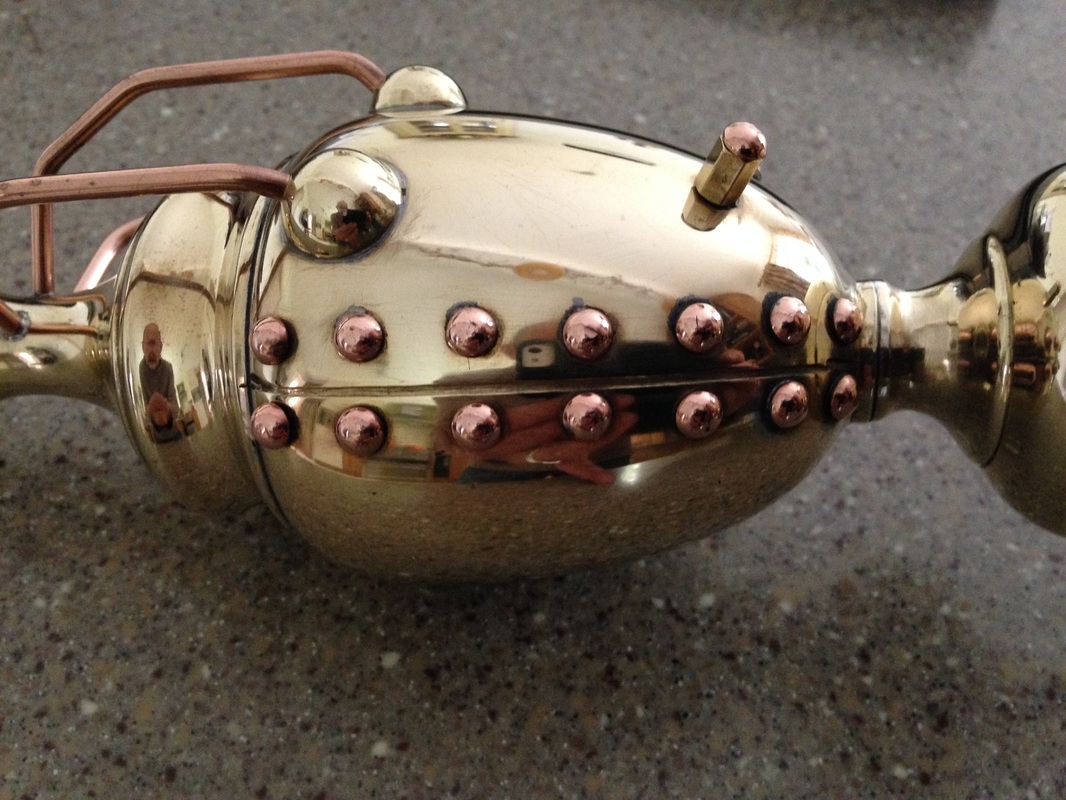
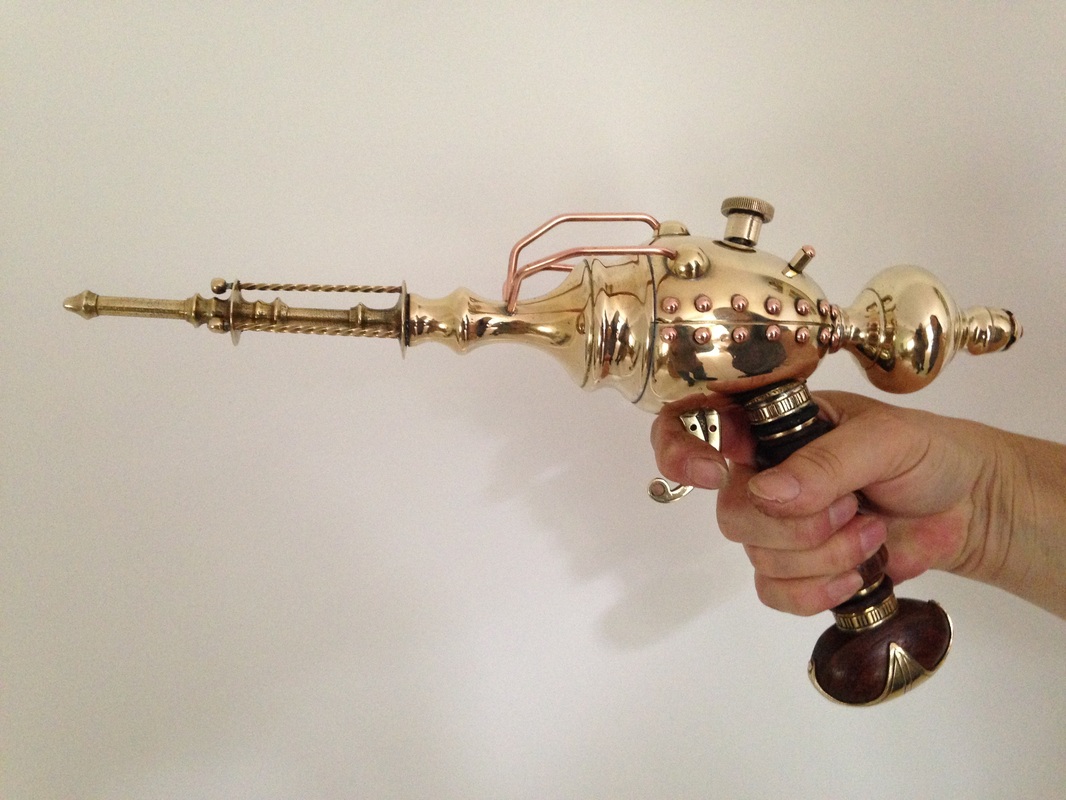
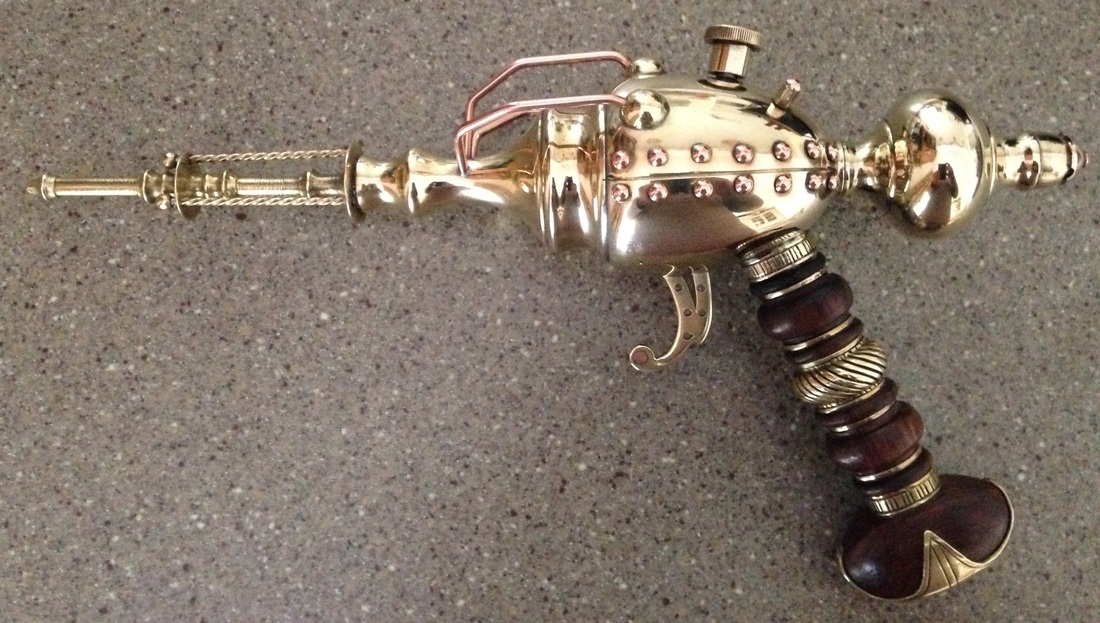
Firstly, I cut a groove with a saw along each side of the main ‘bulb’ section. Once happy that they looked like the component was made in two parts, I marked and drilled 14 holes each side along the lines.The next step was to solder the tapered part of the body (muzzle section) to the bulb part. I could then solder-in 28 x 1/8” x 3/8” copper dome-headed rivets. This gave the appearance of the section being two-part and riveted together.
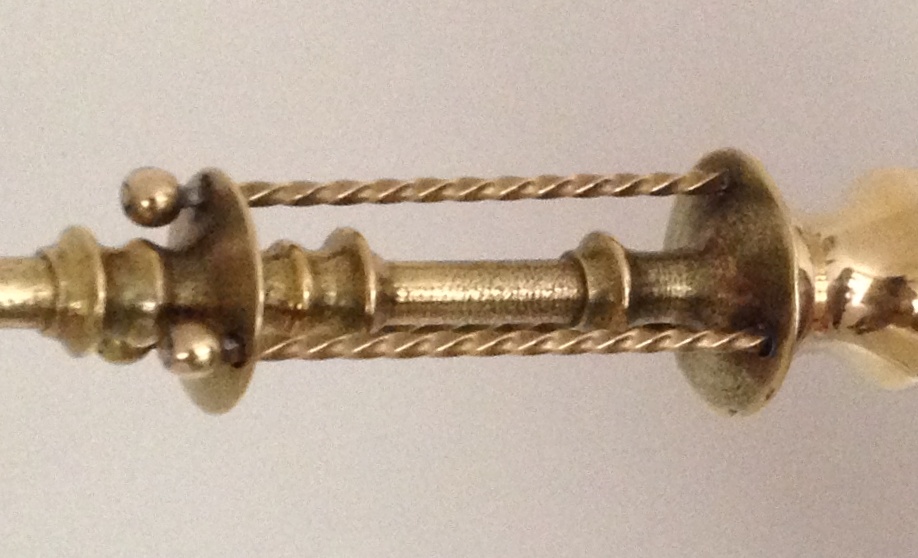
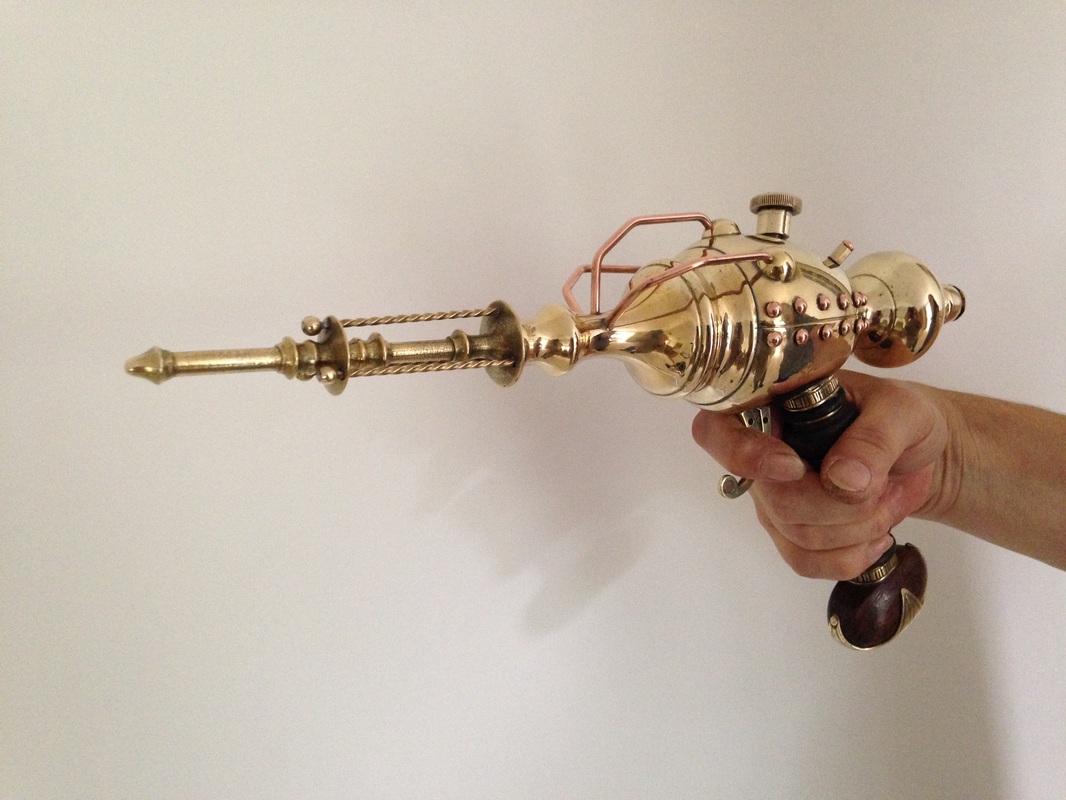
Stage two was to construct the front-end of the weapon. The main component is taken from an old wall-mounted brass candle sconce. The two ends were removed and the tip shaped into a conical terminal. 25mm holes were then drilled in the two flared sections ready to accommodate the twisted brass wires. The twisted wires were made by simply taking some square section brass rod, gripping one end in a vice and the other end into an electric drill.
Keeping the tension in the rod taught, short bursts of the drill will twist the rod. Cut this into lengths required and solder-on a brass ball terminal on one end of each rod. These were then positioned and soldered into place along the ‘barrel’ between the flared sections. Once completed, this part was then soldered on to the main body assembly.
Keeping the tension in the rod taught, short bursts of the drill will twist the rod. Cut this into lengths required and solder-on a brass ball terminal on one end of each rod. These were then positioned and soldered into place along the ‘barrel’ between the flared sections. Once completed, this part was then soldered on to the main body assembly.
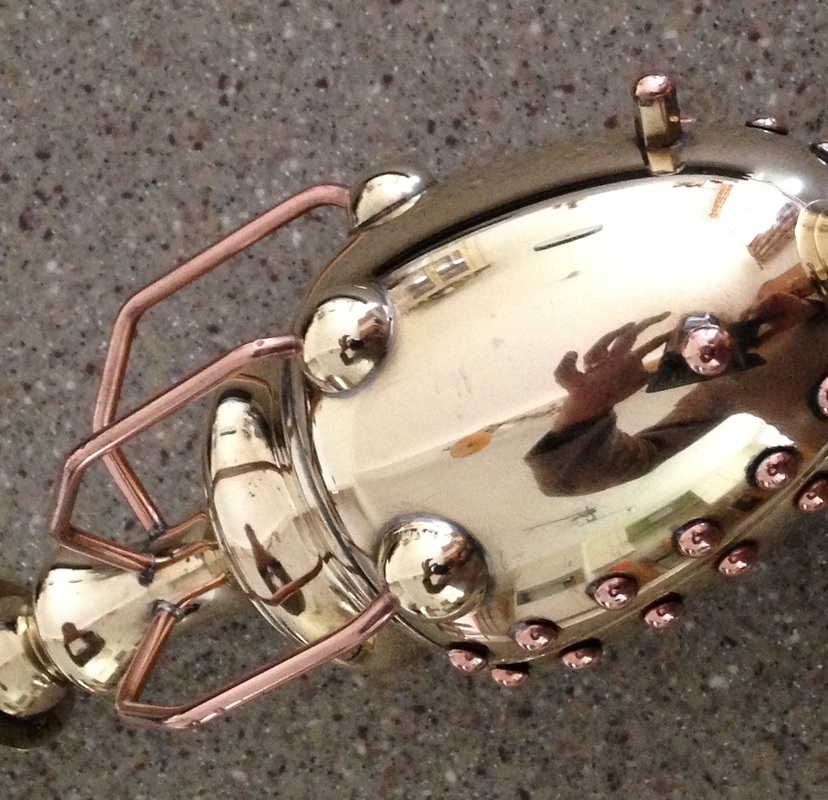
Piping and pipe terminal domes. Three evenly spaced 1/8” holes were drilled into the barrel section. These will take the forward end of the 1/8” copper pipes. Three brass domes were made from 1mm thick brass sheet, cut into discs, annealed and domed by hand in a doming block. 1/8” holes were then drilled to receive the other end of the copper pipes. Once soldered into place, the pipe-work was complete. Lastly, two holes were drilled to accommodate two small brass hex nuts (the type used as spacers in computers) which were capped with a copper rivet to compliment the ones along the flanks of the weapon.
The rearward bulb was then soldered into place, which, in turn was capped with a brass dome and a secondary bronze dome with cut-outs for decoration.
My initial thoughts for the grip were to cut and shape a wooden grip and inset it with upholstered leather or bone. However, I wasn’t entirely satisfied with the quality of wood I had so it was discarded (for now!) I ended up using the hilt of a replica iron-age sword that I had spare in the workshop (it was a prototype piece). It really complimented the whole build with its alternating brass and ‘sheesham’ wood. Although it looks round, it is actually oval in section.
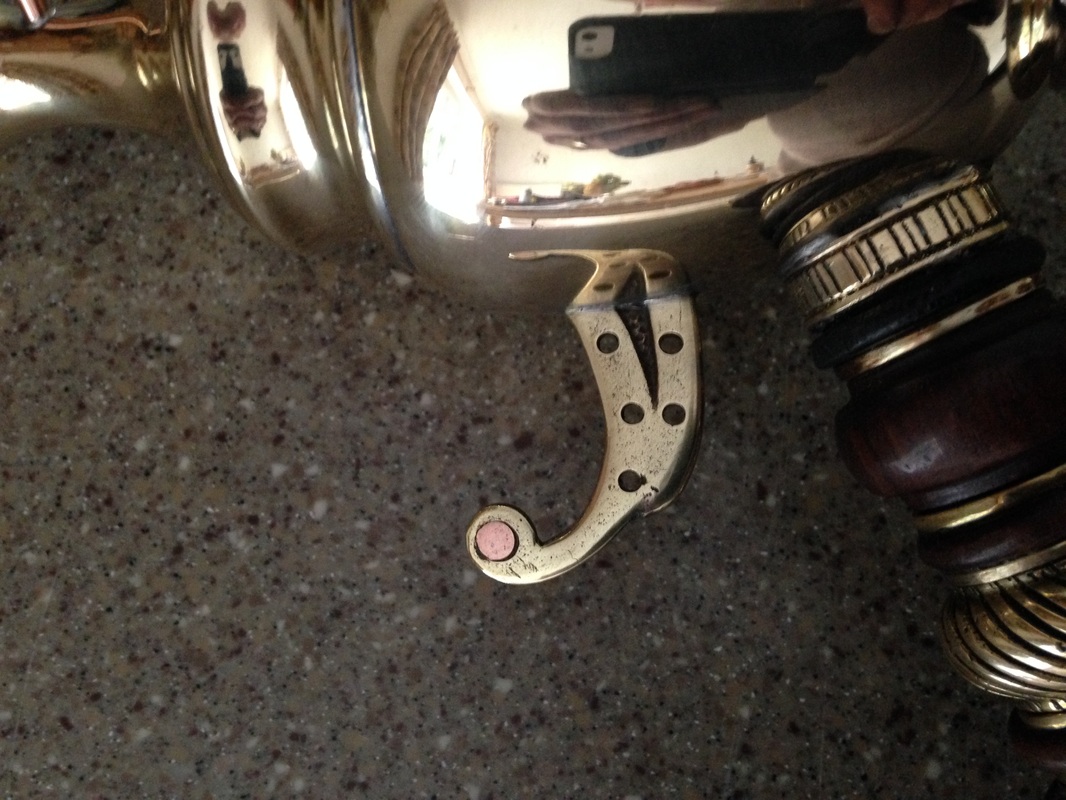
Lastly, the threaded adjuster knob was added to the top of the gun and the trigger added. The trigger was shaped from another small piece of brass sconce, into which I drilled 5 x 2.5mm holes. The terminal expansion was drilled to 1/8” and countersunk on both sides. This was completed by riveting-in a small section of 1/8” copper rod as an inset.
From start to finish – approximately two day’s work.

 RSS Feed
