I must tip my hat to Natasha Ransom of the esteemed ‘Great Kentspectations’ Steampunk group for my initial inspiration for this project. The group has a website at
www.greatkentspectations.co.uk and also a page on Facebook – A thoroughly splendid
bunch!
www.greatkentspectations.co.uk and also a page on Facebook – A thoroughly splendid
bunch!
The Basic Bracer
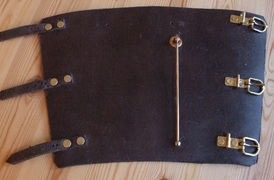
Starting with the basic leather bracer, made from 4mm dyed-thru veg-tan leather with three brass buckles and keepers from my local haberdashery
supplier (http://www.fabric8online.co.uk/).
Leather is cut to shape and the
buckles and keepers riveted on. The brass buckle hinges were cut and folded from thin brass sheet. Here you can see the aether aerial (aetherial?) which is a flip-up brass rod with a brass finial soldered-on. This is connected to the bracer with a simple hinge mechanism made from a Sam Browne stud.
The ‘Incoming Transmission Alert’ System
(Bells!)
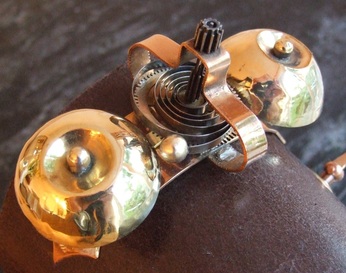
The bell cups were made from discs cut from two slightly different gauges of brass sheet to allow for a different tone when struck. These
start off as flat discs, cut from sheet with tin snips. They were then annealed to make more malleable and carefully hammered and shaped in a ‘doming block’. The bottom edges were then finished level and the indentation at the top of the dome was then made by gently hammering with a small ball-peen hammer over a 15mm tube held in the vice. The holes can then be drilled (or punched) for mounting later on.
The mounting bars for the bells were made from a 3mm diameter brass rod flattened at one end with a hammer to allow for fixing to the metal mounting plate, (cut and shaped
from 18 gauge bronze sheet) which in turn will be riveted to the leather bracer. These were then shaped to fit the curve of the mounting plate and the ends bent to shape for the bells. Holes are punched or drilled to take the small rivets which will connect it to the mounting plate and the hand-wind ringer/hammer spring. Due to the order of construction, the bells must be mounted after the mounting plate in fixed in place as riveting the parts together with the bells fitted wouldn’t be possible. This was done by
soldering a small brass ball on each upright to support the bell and another on top to
hold the bell in place.
Purely for effect, to achieve a ringing sound without the need for electronics, I opted for some clock parts assembled into a striker mechanism which could be spun manually. The parts used were a gear wheel on its axle shaft and a coil spring from an old clock. The ball-ended ‘hammer’ is attached by trimming the end of the coil spring to fit snugly into the hole of a brass ball/bead which is then soldered into place. The bronze supporting frame/housing was cut out, shaped and soldered to the mounting
plate. The finial was added by using another clock gear, soldered to the top of the axle shaft. The base of the axle/shaft of the gear was peened loosely to the housing, in which I made a shallow countersink to allow free spinning by hand. When spun, the brass ball strikes each bell on every rotation making a very pleasant sound!
(Bells!)
The bell cups were made from discs cut from two slightly different gauges of brass sheet to allow for a different tone when struck. These
start off as flat discs, cut from sheet with tin snips. They were then annealed to make more malleable and carefully hammered and shaped in a ‘doming block’. The bottom edges were then finished level and the indentation at the top of the dome was then made by gently hammering with a small ball-peen hammer over a 15mm tube held in the vice. The holes can then be drilled (or punched) for mounting later on.
The mounting bars for the bells were made from a 3mm diameter brass rod flattened at one end with a hammer to allow for fixing to the metal mounting plate, (cut and shaped
from 18 gauge bronze sheet) which in turn will be riveted to the leather bracer. These were then shaped to fit the curve of the mounting plate and the ends bent to shape for the bells. Holes are punched or drilled to take the small rivets which will connect it to the mounting plate and the hand-wind ringer/hammer spring. Due to the order of construction, the bells must be mounted after the mounting plate in fixed in place as riveting the parts together with the bells fitted wouldn’t be possible. This was done by
soldering a small brass ball on each upright to support the bell and another on top to
hold the bell in place.
Purely for effect, to achieve a ringing sound without the need for electronics, I opted for some clock parts assembled into a striker mechanism which could be spun manually. The parts used were a gear wheel on its axle shaft and a coil spring from an old clock. The ball-ended ‘hammer’ is attached by trimming the end of the coil spring to fit snugly into the hole of a brass ball/bead which is then soldered into place. The bronze supporting frame/housing was cut out, shaped and soldered to the mounting
plate. The finial was added by using another clock gear, soldered to the top of the axle shaft. The base of the axle/shaft of the gear was peened loosely to the housing, in which I made a shallow countersink to allow free spinning by hand. When spun, the brass ball strikes each bell on every rotation making a very pleasant sound!
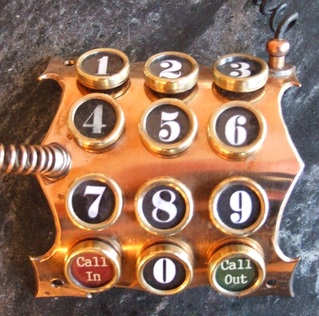
The key-pad dialling plate.
Cut and shaped from more 18-gauge bronze sheet, it was cut out,
and curved to fit the shape of the bracer, 3mm diameter holes were punched and countersunk on the rear face to accommodate the keys’ backing rivets.
The keys are simply old
typewriter keys, cleaned and polished back to the brass, with flat-headed rivets (or copper slate nails) soldered centrally to the back of each housing. These can be tricky to rivet to the plate without damaging the brass housing, so use an upright ‘anvil’ that will fit inside the diameter of the housing. A simple steel rod of 10-12mm diameter works well.
* You can see that I used the same keys on the wrist-mounted Gatling gun made for my son in the portfolio gallery.
Once riveted to the plate, the lettering, glass and brass retaining ring can be put back in-place. A small dab of super-glue helped to keep the brass covers in-place. As the keys were old, and almost unreadable, I printed a new set of numerals onto thin card.
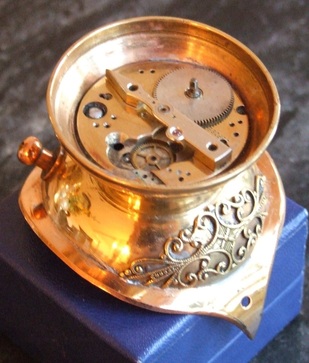
The speaking tube, or ‘oscillating voice converter
membrane’.
Made from a small brass flower vase left over from my jet-pack project, the base was shaped
with a power file and finished by wrapping abrasive sheet around a 60mm diameter steel bar in order that it fit onto the curved mounting plate. The speaker contains the innards of an old wristwatch glued in-place. The grille cover is a brass stamping found on the internet.

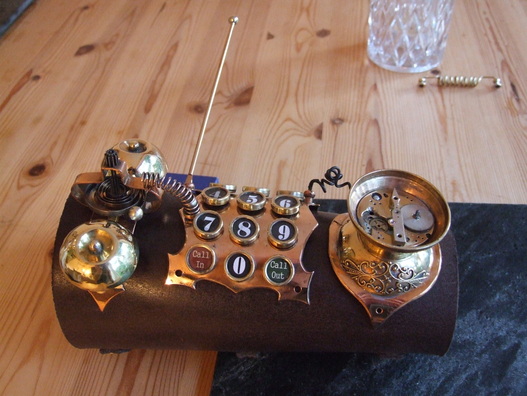
Almost finished! Here it is loosely assembled but still with some more parts to be made and added. Hopefully the finished piece will be ready to photograph in the next day or three!
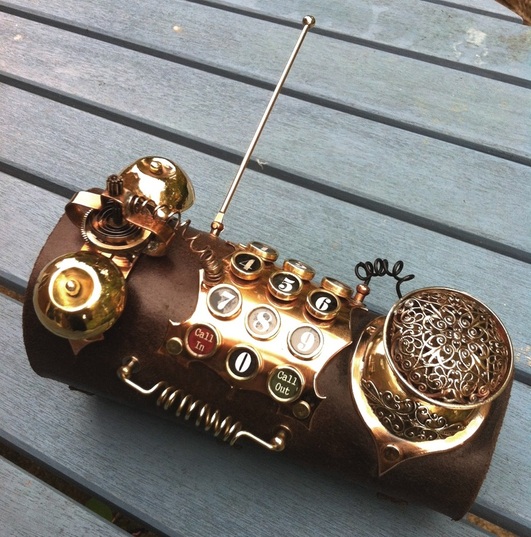
Here's the finished piece!
 RSS Feed
